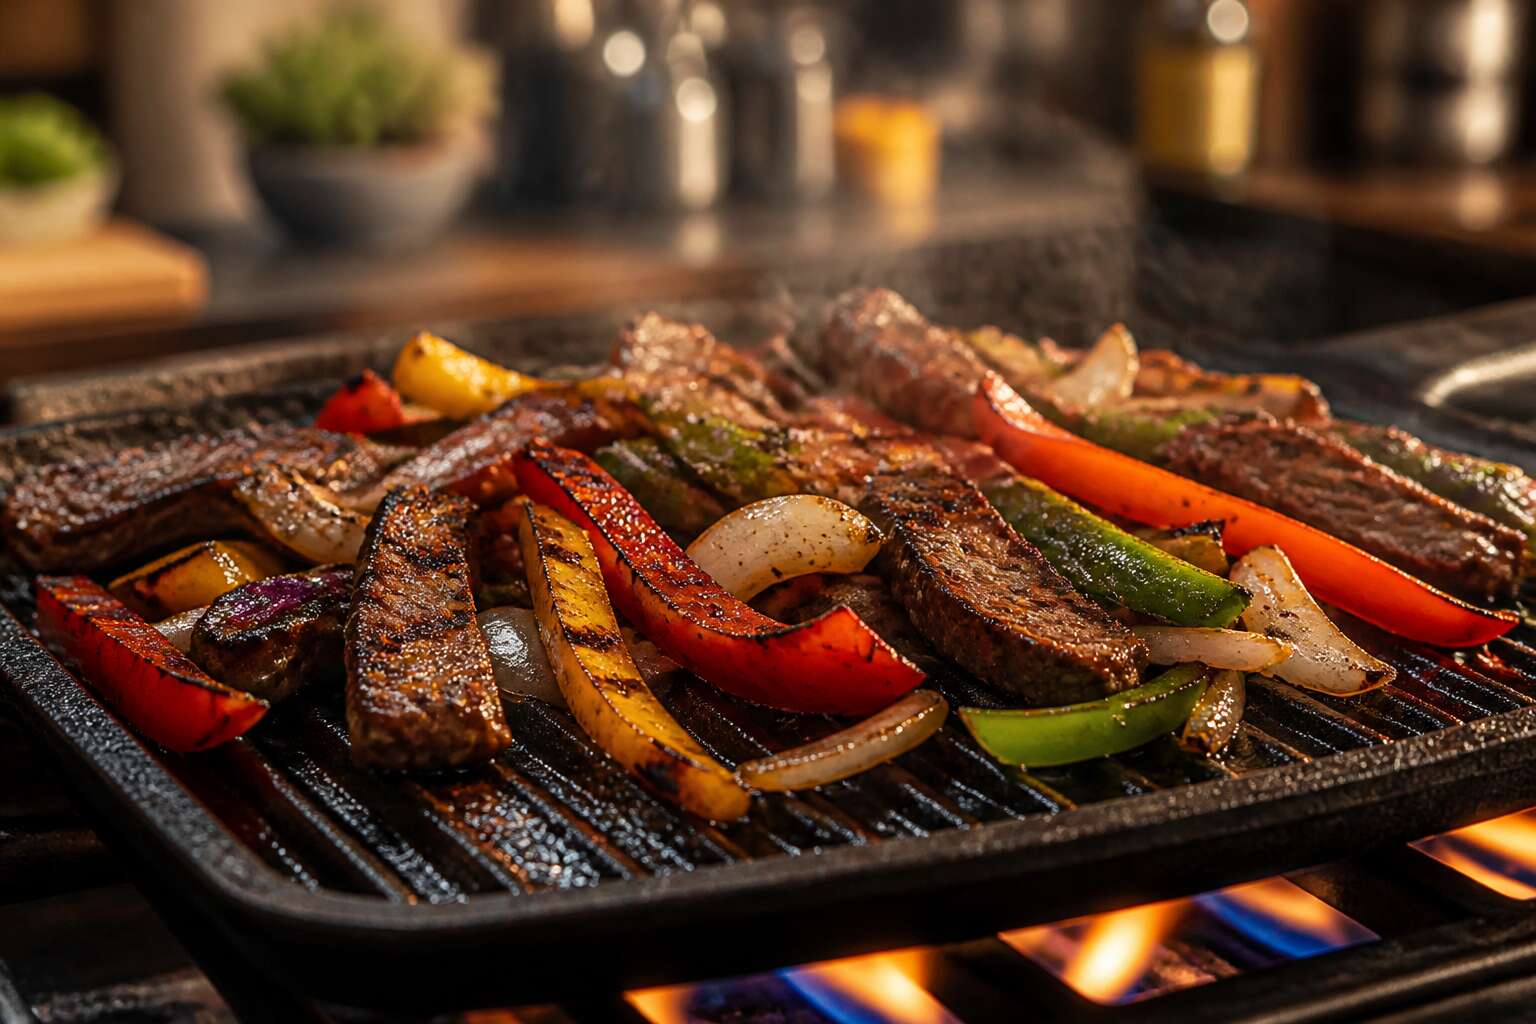
Selecting the Perfect Grill Plate for Your Gas Stove
Understanding Your Burner Size and Shape
When I first replaced my gas stove grill plate, I assumed all burners were equal. They are not. The flame pattern from a circular burner differs drastically from an elongated one. Measuring the grate span before shopping saves frustration.
- Round burners pair with circular or square plates that center over the ring.
- Oval burners require plates with a matching elongated footprint.
South African kitchens often have mixed burner sizes. A poor fit wobbles or blocks airflow. The right match transforms heat distribution completely.
Matching the Grill Plate to Your Cooking Style
A warped grill plate ruins a perfect sosatie. I discovered this after buying a thin steel model. The metal buckled within a month. Your cooking style should dictate the plate’s construction more than its size does.
Heavy cast iron retains heat for a slow braai. A lightweight aluminum plate heats fast but scorches easily. Consider your staples:
- Maize pap and eggs need a smooth, flat surface.
- Steak and chops demand ridged plates that sear properly.
The gas stove grill plate must suit your daily meals. A dedicated piece costs more but lasts longer. For frequent entertaining, a dual-purpose plate with both flat and ridged sides works best. Your stove will thank you!
Considering Weight and Heat Retention
Weight dictates how a gas stove grill plate reacts to your burner’s output. Heavy cast iron absorbs heat slowly and releases it steadily. Light aluminium responds instantly but loses heat when the flame drops. That is why thermal mass matters more than price.
Here is a practical gauge for evaluating your options:
- Lift the plate. If it feels hollow, expect hot spots.
- Run your thumb across the base. Deep ridges mean thicker metal.
- Read the material label. Steel alloys vary in density.
My own test with a thin plate produced scorched edges and raw centres. Swapping to a 7kg cast iron gas stove grill plate changed everything. The retained heat carried the cooking through even after I reduced the gas. Your burner’s output should meet the plate’s mass halfway.
Evaluating Surface Area and Ridge Design
Surface area dictates how much food you sear at once and how evenly your gas stove grill plate distributes heat. A larger plate on a small burner leaves cold zones. That mismatch creates uneven cooking; the plate is not faulty, the heat source and cooking surface are misaligned.
Ridge design controls how fat renders and how char forms. Wide ridges let smoke escape and create sear lines. Narrow ridges trap moisture, steaming food instead of grilling it. The gap between ridges is where fat drains or settles, and getting this wrong ruins the texture of any steak!
- High, wide ridges for steak and chops
- Low, narrow ridges for fish and vegetables
- Flat center sections for eggs or griddle work
In my experience, a gas stove grill plate must match your portion sizes and burner reach. Exceeding the burner’s coverage produces uneven results, regardless of ridge design.
Materials and Construction: What to Look For
Cast Iron Pros and Cons
The material of your gas stove grill plate determines its honesty. Cast iron reveals manufacturing quality that metals hide. It demands seasoning, a polymerized oil layer that builds over time. Neglect it, rust appears. Maintain it, the surface turns non-stick. Construction matters: seek plates cast as one piece, without welded seams that trap carbon. Thin steel bends under thermal stress; cast iron withstands sudden changes. Here is the honest ledger:
- Pros: retains heat, develops ease of release, lasts decades
- Cons: heavy, needs careful drying, heats slowly
That weight is a physical requirement. A flimsy gas stove grill plate cannot sear with stability. Pick up a properly cast iron surface and feel its core. This density transmits temperature evenly, letting onions caramelize without burning. Choosing right means respecting the metal’s limits and strengths.
Stainless Steel Durability
Nearly 60% of professional kitchen equipment relies on stainless steel cladding. Still, a poorly made gas stove grill plate can warp within a single braai season. I have tested several models, and the difference is dramatic! Durable ones share a common architecture. A thick base plate extends past the cooking surface.
Durability comes from cladding. A single stamped steel sheet cannot resist the cyclic expansion of repeated heating and cooling. Manufacturers instead bond an aluminum core between two steel layers. That core absorbs thermal shock. The bond’s survival is what matters. A continuous roll at the rim indicates a solid seam. Crimped edges fail early.
The visible signs of quality construction are:
- The bottom surface shows concentric rings from spun metal, not milling marks.
- The rim is thick enough to support the plate’s weight without bowing.
- Handles, when present, are riveted and sealed, welded, or absent entirely.
Non-Stick Coating Options
Non-stick coatings often masquerade as a shortcut to easy cleaning, but they bring their own grudges. On a gas stove grill plate, the coating’s adhesion matters more than its brand name. Cheap sprays flake off after a few high-heat braais, leaving you to scrape carbonized sosatie residue off bare metal.
Look for a coating applied over a roughened substrate. That roughness gives the layer something to latch onto. Also consider the maximum temperature rating; many coatings surrender at 260°C, while your plate can exceed that in minutes.
- Check for a double coat, visible as a uniform color and no thin patches.
- Prefer plates with uncoated rims to handle metal tongs without chipping.
Your gas stove grill plate may also ditch coatings entirely. Seasoned cast iron or bare steel offers a nonstick surface through polymerized oil, which is free to renew.
Porcelain Enamel Finish
Porcelain enamel is glass fused to steel at high temperatures. It gives your gas stove grill plate a glossy surface that resists chips and corrosion. But not all enamel is equal. Look for a thick, even layer over heavy gauge steel. The best finishes show no speckling or pooling. If you see metallic grey underneath, the coating is too thin. Also, check the edges. Enamel that stops short of the rim invites rust. And remember, enamel hates thermal shock. A cold plate meets a hot burner, and you get crazing, which is a web of tiny cracks. It does not ruin cooking, but it traps grease.
Choose a matte finish because it hides scratches better than gloss. And for the love of biltong, avoid white enamel, as it shows every scorch mark. When inspecting a gas stove grill plate, pay attention to the details:
- Even color across the surface
- No bare spots on corners
- Rounded edges that resist chipping
Your plate will thank you when you take a metal spatula to it with reckless abandon.
Handles and Edges Built for Safety
The handle of a gas stove grill plate receives more stress than the cooking surface itself. A loose or flimsy handle turns a simple meal into a hazard. Look for handles made from solid materials like phenolic resin or cast stainless steel. They should be securely riveted, not screwed, because screws work loose over time.
Edges matter equally. Rolled edges prevent cuts and chipping. Check that the rim is continuous and free of burrs. If the plate has a helper handle, ensure it is positioned away from the burner flame.
- Test the handle for play before buying
- Inspect for gaps between handle and plate
- Verify smooth, rounded corners along the entire perimeter
Construction quality shows in these details. A sturdy handle and safe edges make this gas stove grill plate safer for everyday cooking.
Size, Fit, and Compatibility with Your Stove
Measuring Your Burner Diameter
Before buying a gas stove grill plate, measure the burner diameter with a ruler or tape. I always tell home cooks to place the measuring tool across the center of the burner grate, from one inner edge to the other. Record the reading, then compare it to the product specifications. A mismatch of even a few millimeters can reduce heat transfer and create unstable surfaces.
Here is a quick sequence to verify compatibility:
- Turn off the gas supply for safety.
- Remove the grate to access the burner base.
- Measure the widest point of the flame ring.
Use this measurement when selecting your gas stove grill plate. Most manufacturers list the compatible diameter range on the packaging or webpage. If your stove uses a dual ring burner, measure both rings separately, because some grill plates only cover the inner ring.
Round vs. Rectangular Plates
Most gas stove burners are circular, yet a rectangular plate can turn two burners into one long griddle. That difference changes how you cook. A round gas stove grill plate sits over a single flame ring, giving you even heat for a small batch of food.
Rectangular plates solve a different problem. They bridge adjacent burners or cover an oval flame pattern common on larger stoves. The benefit is a continuous searing zone, no awkward gap between two pans.
When you assess the fit on your own stove, remember:
- The plate edges must sit inside the trivet rails
- A round plate should rest level, with no rocking
- Rectangular plates need the burner spacing to match the plate’s slot positions
A mismatched shape still cooks, but the heat distribution suffers. The right gas stove grill plate delivers even heat across the whole cooking surface.
Replacing Your Stove’s Original Plate
Your stove’s original plate has a precise recess and rim height that match the burner bowl. A replacement gas stove grill plate changes those dimensions. The flame can escape underneath or get strangled by a too tight seal. You must judge whether the aftermarket plate sits correctly on the trivet arms.
Watch the clearance when you swap in a thicker plate. The raised cooking surface can interfere with the flame spread and leave your food cooking on unequal heat. Before you commit to a new plate:
- Compare the rim height of the new plate to the original
- Make sure the plate edges rest inside the trivet rails
- Check stability with the plate laid down flat
If the new gas stove grill plate rocks or leaves a visible gap, the fit is wrong. Return it. The correct fit matters more than the material or the brand.
Universal Fit vs. Brand-Specific Plates
Universal fit gas stove grill plate options advertise one size for many stoves. That sales pitch hides a practical truth. Each brand shapes its burner bowls and trivet rails differently. A plate that sits flush on one stove may hover above the flame on another.
Brand specific plates arrive with dimensions matched to the original part. The rim height, the recess depth, and the way the plate rests on the trivet arms all follow the manufacturer’s specification. Universal plates ask you to troubleshoot those variables yourself.
- A universal plate may cover several stove brands but fit none perfectly
- Brand specific plates reflect the exact burner geometry of your model
- The price gap between the two narrows once you consider wasted fuel
South African kitchens hold a mix of Defy stoves, Samsung units, and European imports. Universal plates suit the common denominators. Brand specific gas stove grill plate choices eliminate guesswork.
Mastering Grilling Techniques at Home
Achieving Perfect Sear Marks
Perfect sear marks are the signature of confident cooking. On a gas stove grill plate, those dark caramelized lines emerge when the surface is properly preheated and the protein is dry. I wait until the first wisp of smoke appears before laying down a steak. That moment guarantees the metal is hot enough to trigger the Maillard reaction instantly.
Resist the urge to shift or lift the food too early. The protein will naturally release once the crust forms. If you tug and it resists, give it more time. Rotate the steak ninety degrees halfway through the cook to create the crosshatch pattern that signals a well executed sear.
Even heat matters as much as timing. A gas stove grill plate with consistent heat delivery allows each ridge to work evenly, producing uniform marks without scorched edges. With practice, this becomes instinct, and the results speak for themselves.
Managing Heat Zones for Even Cooking
Heat zones are the structure of a good grill session. On a gas stove grill plate, the area directly above the burner runs hotter than the perimeter. That difference is not a flaw. It is a tool. I use the centre for quick searing and the edges for gentle cooking, which means one plate handles a steak and vegetables without juggling pans.
Managing these zones requires a simple mental map. The hottest zone sits over the burner core. The cooler zones wait at the edges. A few minutes of observation, watching how food behaves in each spot, is more useful than any thermometer.
Consider the arrangement:
- Centre for fast browning
- Middle ring for steady cooking
- Outer edge for keeping food warm
That layout turns a single gas stove grill plate into a multi-temperature station, which is the difference between cooking and orchestrating!
Marinating and Flavoring Tips
I have watched otherwise sensible people ruin a good piece of meat by rushing the marinade. Patience is the ingredient that no spice blend can replace. Marinating works by allowing salt and acid to penetrate muscle fibres, a process that takes time. On a gas stove grill plate, the ridges create char lines, but the marinade does the real work.
Balance oil, acid, and salt for a foundation. The order of operations matters.
- Marinate overnight in the refrigerator
- Remove protein thirty minutes before cooking
- Pat completely dry with paper towels
This last step sets up the browning that a gas stove grill plate delivers with its intense surface heat! Sugary glazes burn before the interior cooks, so apply them only at the end. The result is a crust with a juicy centre, which is the point of every technique.
Cooking Vegetables and Seafood
The Sunday braai centres on lamb chops, but vegetables and seafood are the real test. A gas stove grill plate concentrates heat into narrow ridges, and this specificity changes how produce cooks. Baby marrow develops caramelised edges. Paprika dusted calamari turns crisp at the edges while staying tender inside. What a difference the right heat makes!
Different ingredients behave in distinct ways:
- Firm vegetables, like butternut slices, take on deep colour where they rest on the ridges.
- Leafy greens, which many avoid on a gas stove grill plate, collapse within seconds.
- Fish fillets, especially kingklip, stick and tear if moved too early.
I once left snoek unattended for two minutes while I reached for a drink. The outside blackened while the centre stayed raw. Nothing about this tool forgives neglect.
Using the Grill Plate for Breakfast Favorites
Breakfast on a gas stove grill plate is a test of patience. The ridges toast bread in under a minute, but they also trap egg white if you pour it carelessly. I keep the heat medium and let bacon render before adding anything else. That fat becomes a cooking medium for mushrooms and tomatoes.
Here is what I learned from mornings on this plate:
- cut tomatoes in thick rounds so they do not collapse
- halve boerewors lengthwise so it cooks through
- place eggs in a ring mould or leave them for last
The same gas stove grill plate that sears snoek after sunset will crisp a hash brown before sunrise. You just have to adjust your attention span.
Low-Oil Cooking for Healthier Meals
Most home cooks pour oil straight onto the gas stove grill plate and call it done. The ridges do the real work. They lift food above the surface and let excess fat drain away. I have learned to oil the food, not the metal, using a silicone brush and a dish of cold-pressed olive oil.
Mastery lies in reading the heat. When smoke starts to wisp, the plate is ready. Place chicken thighs skin-side down and listen for the hiss. The fat renders slowly, basting the meat from below. It is a quiet process, but it rewards attention!
- Choose cuts with natural marbling
- Rest meat on a wire rack
- Reserve rendered fat for roasting
This restraint suits our South African kitchen, where braai culture respects the fire. The same gas stove grill plate that sears a steak can wilt spinach with only residual oil left behind.
Cleaning, Maintenance, and Longevity
Seasoning Your Cast Iron Plate
Seasoning a cast iron insert is the quiet secret behind a gas stove grill plate that behaves differently after a year than on day one. The heat treatment transforms ordinary oil into a polymerised layer, which is not merely a coating but a structural change in the metal itself. Clean care keeps that layer intact.
The routine is straightforward:
– Wipe the plate clean while residual heat remains.
– Use coarse salt and a cloth for stubborn char.
– Rinse sparingly; water is the enemy of a seasoned surface.
– Return the plate to the burner to evaporate all moisture.
– Apply a thin layer of sunflower oil, then heat until it smokes lightly.
This method avoids the flaking that plagues plates scrubbed with abrasive soap. A well maintained cast iron plate develops a dark, slippery surface that releases food cleanly. Neglect that process, and rust spots spread beneath the seasoning. The right attention turns a simple gas stove grill plate into a durable piece of equipment that serves reliably for years.
Safe Cleaning Practices for Different Materials
Improper cleaning ruins a gas stove grill plate faster than heavy cooking does. Each material answers to a different hand. Cast iron wants heat and salt, stainless steel prefers warm water and a soft brush, and non-stick surfaces recoil from metal scrapers. Porcelain enamel tolerates mild detergent but chips if knocked.
Brief soaking loosens stubborn char without abrasive force. Dry every surface immediately, because trapped moisture accelerates rust and coating breakdown. A clean cloth without fibres preserves the ridges.
- Cool the plate fully before washing
- Never shock a hot surface with cold water
- Check edges monthly for fractures
Stainless steel gains a warm patina over time, which is normal wear. Non-stick coatings lose integrity after a few seasons, so replace the plate once food begins sticking. Porcelain enamel stays bright for years with gentle care. Matching the routine to the material extends a gas stove grill plate’s lifespan.
Removing Stubborn Residue Without Damaging the Surface
After a fierce braai, that charred crust on your gas stove grill plate can cling with astonishing tenacity. I have seen cooks attack it with wire brushes and rough steel wool, only to scar the cooking surface. The gentle path works better.
Cover the cold plate with warm water and a few drops of dish soap. Wait ten minutes, then scrape with a bamboo or silicone tool. Residue lifts in sheets, not fragments. For baked-on carbon, press a moist baking cloth over the ridges and allow steam to soften the film. Repeat twice if needed. A clean, oiled plate resists future sticking, which reduces scrubbing and preserves the surface. My own cast iron plate has survived years with this method. Patience removes more residue than force. Any gas stove grill plate responds to kindness.
Storing Your Grill Plate Properly
The final act of a good cooking session, storing your gas stove grill plate, holds more consequence than most home chefs realise. A plate left damp in a dark cupboard develops rust spots, while careless stacking risks chipped edges and warped ridges. After cleaning, warm the plate on a low burner for a minute to drive off residual moisture, then wipe a thin film of cooking oil across the surface. This simple step preserves the seasoning and keeps the finish intact.
Choose a storage spot that is dry and well ventilated. Avoid placing your gas stove grill plate flat under heavy cookware. Instead, consider these practices:
- Rest it upright or on its side with a soft cloth between plates if stacked.
- Keep the ridged surface facing up in a dedicated drawer liner.
- Check periodically for moisture, especially during humid coastal months.
With these habits, the plate stays ready for your next braai without needing extra scrubbing.
Knowing When to Replace Worn-Out Plates
Cleaning alone cannot postpone the inevitable. Every gas stove grill plate reaches a point where maintenance stops delivering results. The signs are specific:
– Tiny stress fractures along the ridge bases
– A wobbly fit on the burner grate
– Seasoning that flakes into your food
These indicate the metal has fatigued.
I have kept plates alive for years with disciplined oiling, but the finish eventually cannot be restored. When food sticks in patterns that match visible wear, the surface has lost its non-stick character permanently.
A replacement gas stove grill plate costs less than the frustration of burned meals and the health risks of a compromised cooking surface. Once rust pits form, no amount of scrubbing or re-seasoning will return the plate to a safe condition.


0 Comments