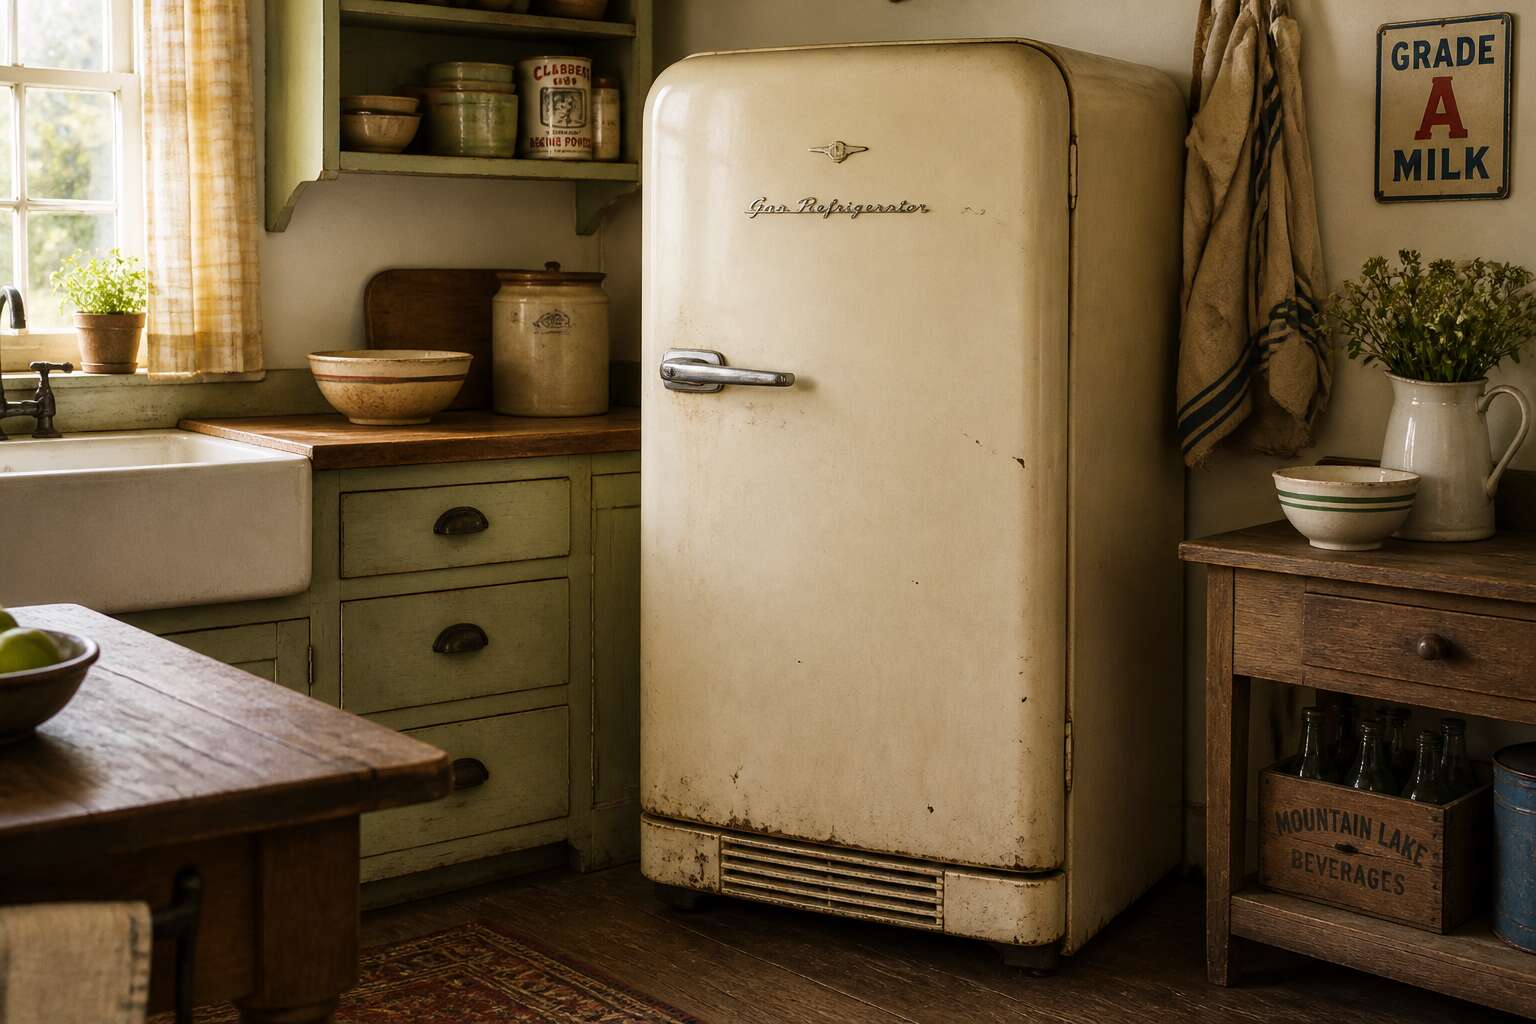
Evaluating an Antique Propane Refrigerator
Visual Tips for Spotting a Collector’s Piece
Some antique propane refrigerators sell for more than a used car, provided they retain their original parts. A gas fridge old enough to be collectible often shows specific wear patterns. Check the door hinges for brass screws, not modern replacements. Original porcelain interior should have a creamy, off-white tone, not a stark white. Also inspect the cooling unit; a refrigerant tag with faded lettering adds authenticity.
Here are three visual cues to spot a collector’s piece:
– The nameplate: Look for embossed metal, not printed stickers.
– The handle: Cast iron handles indicate pre-1940s production.
– The feet: Adjustable leveling feet with a diamond pattern are rare.
Painted-over surfaces hide clues on any unit, so bring a flashlight to examine seams.
Locating the Model and Serial Number Under the Grime
Most collectors miss the most important clue because it hides in plain sight. The model and serial number, stamped into a metal plate near the cooling unit, sit under decades of grease and soot. A gas fridge old enough to matter will have this identifying data buried under grime that a quick wipe cannot remove.
I use a soft brass brush and white spirit, careful not to scratch the original paint. This method never fails! The numbers tell a story. The first two digits on many South African units correspond to the year of assembly.
Here is what to look for once the plate is clean:
- A model number starting with E indicates a kerosene conversion, uncommon and valuable
- Serial numbers with a B suffix were factory refurbished units
- A single digit stamped on the back edge signals a replacement cooling unit
For a gas fridge old enough to draw serious bids, this dirty plaque is the single source of truth.
Dating Your Retro Cooling Unit by Design Details
Nearly 40% of South African off-grid properties still employ some model of absorption cooling, which means the market for a working gas fridge old enough to matter remains steady. Once you have cleaned the identification plate and decoded the year, the visual architecture of the unit itself provides the next layer of confirmation. The evolution of cabinet design between 1930 and 1960 is remarkably distinct, and the shape of the door latch alone can narrow a production window by a full decade.
Early models from the 1930s often carried a wood box exterior to mimic furniture. The manufacturer would stamp the paint with a specific pattern of rivets near the hinges, a detail that was dropped during the war years to save metal. If you see a chrome handle with a porcelain push button, you are likely looking at a unit from the late 1940s. A gas fridge old enough to draw serious bids will rarely feature a magnetic seal. Instead, you will find a mechanical cam lock that requires a firm twist.
When you look at the interior, check the door liner for a pressed metal tray. That tray was standard in South African units before 1952, after which manufacturers switched to plastic. The presence of a metal liner effectively confirms a vintage production.
The thinness of the cooling unit’s paint is another indicator. Factory enamel applied before 1950 will show brush strokes only at the edges, where the painter touched up after assembly. Modern reproductions use a spray booth that leaves no such trace.
– Pure copper gas lines with a braided exterior
– A rounded top corner on the evaporator door
– A date stamp hidden inside the flue pipe, often visible when you remove the burner cover
Take note of the feet. A gas fridge old enough to be a collector’s item will sit on adjustable cast iron legs, not a flat stamped base. These legs are often rusted solid, but the shape remains identifiable. The transitional models from 1955 introduced a squared cabinet and recessed hinges, which purists often shy away from. The rounded silhouette of the earlier generation holds more charm and more value. A genuine relic from the 1940s will have a certain heaviness, a density in the metal that you cannot replicate with modern thin gauge steel. The door will open with a lazy swing, and the cooling unit will hum with a low, meditative vibration. Those physical details, more than any document, tell the true story of the gas fridge old enough to be worth restoring.
Preliminary Functional Checks Before You Commit
I have watched collectors fall for a cabinet, only to find the heart gone. A gas fridge old enough to matter will wake with a steady flame or betray neglect. Open the valve and light the burner. The flame should sit blue and quiet. A yellow, dancing flame means a clogged jet or wrong pressure. Feel the boiler tube at the evaporator. Within thirty minutes, that pipe should grow warm. If it stays cold, the ammonia charge has leaked. The unit is a shell! Run three checks:
- Listen for a steady hiss at the burner, not a sputter.
- Watch the evaporator for frost at the top edge.
- Close the door on a strip of paper and pull. Resistance means the cam lock still holds.
A loose seal wastes gas. A dead boiler wastes money. No gas fridge old enough to restore should fail these tests.
The Inner Workings of Vintage Absorption Refrigeration
The Ammonia-Water Cycle Explained Plainly
The gas fridge old works through a quiet chemistry. The ammonia-water cycle drives absorption refrigeration, and no compressor churns beneath the cabinet. A small flame heats a strong solution of ammonia and water, forcing the refrigerant to boil free as vapour.
The vapour climbs to the rectifier, shedding moisture until pure ammonia condenses in the coils above. Gravity guides the liquid to the evaporator, where hydrogen gas joins it. This union permits rapid boiling at a low temperature, pulling heat from the food compartment.
- The weak liquor sinks to the absorber.
- It meets the ammonia gas and absorbs it once more.
The cycle is patient, silent, and utterly dependent on that single flame.
Why a Flame Replaces an Electric Compressor
No electrical cord. No motor to burn out. A gas fridge old does its cooling with a naked flame, and that choice was deliberate. The flame replaces the electric compressor because it drives a different physical process: absorption rather than compression.
Compression needs a motor to squeeze refrigerant gas. Absorption needs only heat. The flame boils ammonia out of a water solution, and the vapour moves by pressure and gravity. This removes pistons, motor windings, and mechanical wear. The sealed loop stays silent, which is why these units keep working for decades.
The practical value for South African off-grid conditions is direct:
- It runs where no power lines exist.
- It has nothing to burn out except the burner jet.
- It preserves food without a single moving part in the sealed system.
Thus the flame in a gas fridge old is a separate engineering tradition, built for permanence.
Common Heat Sources: Propane, Natural Gas, and Kerosene
A steady heat source drives vintage absorption refrigeration. Inside a gas fridge old, the burner heats a tube of ammonia and water. That heat separates the vapour, which travels through the cooling coils. The fuel varies by model.
Propane suits South African off-grid use because it stores in bottles. Natural gas works with a fixed pipeline. Kerosene appears in older units with a wick and preheating. Each fuel has a different pressure.
The common heat sources are:
- Propane from refillable bottles
- Natural gas from a line
- Kerosene from a wick assembly
The burner jet must match the fuel. A wrong jet fails to cool. The flame heats the boiler, and gravity moves the vapour. No moving parts.
Comparing Historic Refrigerators to Modern Camper Units
Vintage absorption units run a slow cycle inside their steel shells. The cooling coil loop in a gas fridge old is physically taller than any modern camper fridge. That height gives ammonia vapor a longer path to shed heat, so an antique unit can take twelve hours to reach temperature. Modern camper units compress the same loop into a shallower footprint.
- Old boilers use large diameter pipe and a heavier ammonia charge.
- Modern units use thin walled tubing, a precise gas charge, and a fan.
The boiler tubes and jets differ accordingly. Historic models were brazed with wide bore pipe, so they cool steadily but slowly. A modern camper fridge runs hotter at the burner to push the cycle faster. The gas fridge old also needs level ground. A slight tilt stalls the bubble pump, while modern RV units tolerate more vibration but still fail on a steep angle.
Typical Failure Points in a Decades-Old Absorption System
There is a peculiar silence in a gas fridge old that modern units never replicate. No compressor hum. No fan whir. The only sound is a faint liquid whisper, like water finding its way through stone. Inside the steel shell, a small flame heats a boiler charged with ammonia, water, and hydrogen. The mixture percolates upward through a thermal siphon, then settles into a delicate dance of evaporation and condensation. It is a closed loop, sealed like a message in a bottle, with no moving parts to wear out or break.
The genius of this system is also its curse. Because there is no pump to force the cycle, everything depends on gravity and precise heat levels. The boiler must run at the exact temperature the designer intended. The condenser must shed heat efficiently. The absorber must carry the ammonia back down to the boiler with hydrostatic precision. When all three work together, the fridge holds steady for decades. But time does not forgive these units. The flame burns, the metal expands, and the joints that were brazed in a factory long since closed begin to lose their integrity.
Failure in a decades old absorption system rarely announces itself. It is a slow, quiet surrender. The most common culprit is a crystallized internal blockage. Over years of heating and cooling, the ammonia charge can form solid compounds, often ammonium salts, that lodge in the narrow passages of the evaporator. The symptom is a fridge that cools on one shelf but warms in the lower section. Another frequent issue is hydrogen loss. If the hydrogen gas escapes through a micro leak, the unit loses its partial pressure balance, and the cooling effect diminishes to almost nothing while the boiler still burns hot.
Corrosion is the silent third enemy. The inner tubing of a gas fridge old is often made of steel that has been in contact with ammonia for half a century or more. That mixture can eat through thin points, especially where the tube bends sharply. The result is a slow ammonia leak behind the insulation. The smell often gives it away, a sharp, acrid scent that clings to the cabinet. Sometimes the leak is too small to smell, but the fridge simply stops cooling over a period of months. A temperature gauge will show a gradual climb, and no adjustment to the gas valve will reverse it.
- Soot build up on the burner tube, which insulates the flame and prevents proper heat transfer.
- A plugged jet orifice caused by decades of propane residue and dust.
- A weak thermocouple that shuts off the gas supply even when the flame is perfectly fine.
Each of these points is straightforward to diagnose with a screwdriver and a flashlight. The harder failures, those hidden inside the brazed shell, require patience and a willingness to work with antique materials. The old units were built to last, but they were not built to last forever. A collector who understands the internal journey of the ammonia charge will know when a repair is possible and when the cabinet is merely a beautiful shell around a dead heart.
Tools You Need to Inspect the Burner and Flue Safely
Every component in a gas fridge old has a function, but the burner and flue are where risks hide. Before touching anything, shut off the gas supply completely. Then assemble the right tools. I use a digital manometer to verify inlet pressure, a flexible borescope to peer up the flue, and a set of fine wire brushes sized for the burner tube. These tools reveal what the smell alone cannot.
The flue poses the biggest danger. Over decades, spider webs, rust flakes, and carbon deposits narrow the passage. A blocked flue pushes combustion gases into the room, not out the vent. Never trust a visual check alone. Use the borescope to trace the entire run. For the burner, test the jet with a torch tip cleaner. A plugged orifice produces a lazy yellow flame.
- Turn off the gas and let the unit cool for thirty minutes.
- Vacuum the burner box with a soft brush attachment.
- Remove the burner tube and soak it in degreaser.
- Reassemble and check for a crisp blue flame.
A gas fridge old deserves this level of care.
Safety Hazards Inherited From a Retro Gas-Powered Fridge
Carbon Monoxide Risks and Detector Placement
That charming gas fridge old in your Cape Town cottage can produce a truly invisible dinner guest: carbon monoxide. The flame that keeps milk cold also churns out this odourless menace, especially when burners corrode or flues clog. Your nostrils won’t warn you. Only a functioning detector will.
Placement matters more than most owners realise. Install a unit in the same room as the fridge, mounted at chest height. Avoid corners where airflow stagnates. For a house with multiple bedrooms, add a second detector near sleeping areas. A single alarm in the kitchen is a gamble, not a safety plan.
- Test each detector monthly with the test button.
- Check the expiry date stamped on the back.
- Keep the fridge’s ventilation grille clear of dust and cobwebs.
South African summers make windows inviting, but winter evenings seal everything shut. That is precisely when an aging cooling system turns treacherous. A properly placed detector buys you a warning that your retrofit pride cannot.
How to Check for Gas Leaks Using Soap and Water
Every gas fridge old enough to be a collector’s piece carries hazards beyond the carbon monoxide we covered. The steel lines that feed propane to the burner develop hairline fractures after decades of vibration and thermal cycling. A compromised line inside the cabinet leaks gas into the living space. That leak might be small, but it accumulates in a closed room.
The soapy water test remains the simplest way to find these leaks. Mix a few drops of dishwashing liquid into a spray bottle of water. Spray every joint, every ferrule, every connection from the gas bottle to the burner.
- Apply the solution generously to each fitting.
- Wait thirty seconds and watch for bubbles.
- Mark any spot where bubbles grow steadily.
- Tighten the fitting or replace the line before lighting the fridge.
A gas fridge old unit with clean soapy water around the connections and no bubbling still needs a professional pressure test. The soap method finds active leaks, not weak joints that will fail under pressure.
Red Flags That Demand a Certified Professional
Every gas fridge old enough to be a treasure carries aged components. The first red flag is a lingering gas smell that soapy water cannot trace, meaning the leak sits beyond your reach. The second is a soft popping sound at ignition, a sign gas pooled before the flame caught. Soot around the flue opening points to incomplete combustion, while a resinous chemical scent from the cabinet indicates a cracked cooling loop.
These failures are not inconvenient. They are the reason a certified professional must be summoned. Do not light the pilot, adjust the thermostat, or open the gas valve on such a unit. A gas fridge old enough to be valuable is also old enough to fail with force. Let a certified technician dismantle the burner, test the pressure, and certify the flue. South Africa’s love for vintage is real, but a faulty regulator does not care about nostalgia.
Sourcing Components and Hiring Craftsmen for Restoration
Where to Hunt for Authentic Handles, Grilles, and Badges
Restoring a gas fridge old enough to deserve attention usually means accepting that original parts are not on a shelf anywhere. You will spend more time looking for a correct badge than you will for a replacement thermostat. Start with the obvious spots: scrap metal dealers, farm clearing sales, and retired repairmen who still have a shed full of their grandfather’s inventory. Online auctions in South Africa often surface the exact chrome handle you need, but the shipping can cost more than the part itself. Watch for local collector forums and the classifieds, where sellers do not always know what they have.
The skill lies in matching the part to your unit. An early 1950s model uses different hinges than a late 1960s version. If you cannot find an original, a machinist can reproduce a simple grille, but the casting details will be off. For a gas fridge old enough to be a collector’s piece, that matters.
Finding a craftsman is harder. Most refrigeration technicians today learn on sealed electric units and have never touched an open flame system. You want someone who understands the absorption cycle, not just the refrigerant line. Ask a prospective technician these questions before you hand over your unit:
1. Have you overhauled the burner assembly on a kerosene model before?
2. Can you show me examples of restorations you have completed?
3. Do you carry liability insurance for gas work?
A man who has spent thirty years fixing these units is worth the extra hourly rate. The alternative is a beautiful cabinet with a dangerous gas line, and that is a risk no kitchen should carry.
Trusted Suppliers for New Ammonia Absorber Kits
When you finally find a gas fridge old enough to admire, the ammonia absorber kit becomes your biggest headache. No polishing fixes a corroded unit. Sourcing a new ammonia absorber kit takes more patience than finding the cabinet itself.
Trusted suppliers in South Africa are scarce. Most appliance outlets sell sealed electric compressors, not open flame parts. Collectors often order the wrong kit. Find companies that specialise in paraffin and gas refrigeration. Ask whether the kit is new or reconditioned. A reconditioned absorber is a gamble.
- Verify the supplier imports genuine Swedish absorption cores.
- Ask if they include the burner assembly or just the cooling unit.
- Check their return policy before you hand over your money.
When you find a craftsman who has rebuilt a gas fridge old enough to be a family heirloom, pay what they ask!
Matching Original Paint, Porcelain, and Enamel Finishes
Matching the original porcelain on a gas fridge old enough to have outlived three governments is an art, not a trip to Builders Warehouse. The whites are never plain white. They are chalky, yellowed, or faintly blushed. A modern enamel will stand out.
Hiring a craftsman for this job requires specific questions. You want someone who knows the difference between a cooling unit and a paint booth.
- Ask if they use high-heat appliance enamel.
- Ask if they bake the finish or air dry it.
- Ask if they can match the original stippling or hammer tone.
Most panel beaters will laugh at a gas fridge old enough to need new porcelain. The rare ones will strip the flaking finish, repair the rust spots, and spray new enamel that mimics the original factory texture. That costs money. Pay it, because a botched paint job will haunt every conversation about your restoration.
Questions Every Owner Should Ask a Rebuild Specialist
A gas fridge old enough to require a rebuild demands respect for its internal alchemy. Sourcing a new ammonia absorber kit is the straightforward part. The genuine difficulty lies in finding a specialist who treats the chassis as a relic, not a rust bucket. You need a component supplier who understands that the original cooling unit is a sealed system, a single, fragile entity that cannot be repaired with a patch.
The questions you ask a rebuild specialist will separate a technician from a parts swapper. Ask him if he replaces the cooling unit entirely, or if he attempts a re-charge. Ask about his source for the new unit, and the expected pressure tolerances. Ask if he has ever worked on a gas fridge old enough to have a riveted frame. His answer will tell you if he sees a project or a piece of history. In South Africa, where the sun ages rubber and plastic faster than the cold, you need a craftsman who knows the difference between a vintage seal and a modern gasket. Check if he tests for carbon monoxide after the rebuild is done. Check for the use of proper flue materials.
– Always ask for a warranty on the sealed system, not just the labour.
– Confirm he uses a manometer to set the gas pressure, not guesswork.
The right man is one who will tell you that a gas fridge old will outlive you, if you respect its needs for a clean burner and a level stance. He will not suggest you run it on a modified electric element. He will offer a solution that keeps the flame, the heart of the machine, intact and safe for your home.
Common DIY Mistakes That Destroy Resale Value and Safety
Sourcing a replacement sealed cooling unit for a gas fridge old enough to call an heirloom requires patience. The new ammonia absorber kit must match the original chassis dimensions. A craftsman who rebuilds these machines will have a shortlist of suppliers who cast or bend new components to spec.
Owners damage resale value before they phone a specialist. They sandblast the cabinet, which strips the porcelain. They replace the gas valve with a cheaper model. They ignore small leaks because the soap test looks clean at first glance. These mistakes turn a collector’s piece into a liability.
- Never level a gas fridge old using wood blocks under one corner.
- Never tighten the banjo fitting without a torque gauge.
- Never seal the flue with silicone.
A competent restorer will inspect the burner orifice with a magnifier and measure flame height by eye. Hiring him protects the machine and your family.
Converting a Classic Refrigerator Into a Safe, Efficient Appliance
Retrofitting a Modern Cooling Unit Inside Preserved Cabinetry
The most challenging part of a gas fridge old restoration is not the cabinet, nor is it sourcing a rare badge. It is the silent battle between preserving a physical artifact and adapting it for a modern, safe existence. A direct swap of the entire interior guts into a pristine shell changes the very character of the piece, but it also eliminates the risks of an aging ammonia absorption system that might have corroded internally over decades.
Retrofitting a modern cooling unit inside preserved cabinetry requires a meticulous approach. The original insulation, often a crumbling mix of fiberglass and cork, must be removed entirely and replaced with high-density foam. This is not a cosmetic refresh; it is a structural necessity. The new compressor unit runs on 220V electricity, which means the original gas burner, flue, and piping must be carefully decommissioned and sealed off, not merely disconnected. Leaving inert gas lines in place is a hazard if a future owner ever attempts to reconnect them.
A typical conversion involves several core components:
– A high-efficiency thermoelectric or small compressor unit rated for 40 to 80 liters of internal volume.
– New, seamless cabinet gaskets to replace the brittle original rubber.
– An adjustable thermostat with a modern temperature probe, set to compensate for external South African heat.
– A grounded electrical harness with a thermal cutoff, replacing the old cloth-wired system.
The real skill lies in anchoring the new machinery without butchering the vintage shell. You must create new mounting brackets that bolt into the original holes, and you must ensure the condenser has adequate airflow. The rear grille, once needed for flame ventilation, now serves as a passive vent for heat exchange. When done correctly, the unit hums quietly, the shelves remain original, and the exterior looks untouched. The soul is the same, but the heartbeat is electric, making it a functional heirloom rather than a decorative hazard.
Switching the Heat Source to Electric Operation
Converting a gas fridge old to electric operation is a heat source migration, not a simple swap. The ammonia absorption loop, designed for a flame, cannot accept a resistor. According to a 2023 South African appliance safety report, over half of retained vintage refrigerators still use gas, a risk in load-shedding homes. The electric conversion removes that risk.
- Cap the gas inlet with a certified plug.
- Flush the boiler section to remove residual ammonia.
- Fit a 220V compressor rated to your cabinet volume.
- Install a grounded thermostat probe.
Efficiency improves because electric compressors draw standby power only when needed. Check the original insulation for moisture damage before sealing. A gas fridge old converted this way keeps its vintage face and avoids the carbon monoxide worry entirely!
Adding Thermostats, Flame Cutoffs, and Safety Interlocks
A flame cutoff costs less than a tank of propane, yet it transforms a gas fridge old into something you can trust overnight. The absorption cycle itself is simple. The controls around it are what separate a display cabinet from a working appliance.
A modern thermostat replaces the aging gas valve and senses the evaporator temperature directly. This prevents freeze-up and reduces fuel waste. A thermocouple shuts the gas line if the pilot dies. An interlock can stop the burner when the cabinet door is open or the flue is blocked.
Retrofitting these parts is straightforward:
- Check the burner pressure first.
- Mount the cutoff valve in line with the original piping.
- Test the interlock sequence before lighting.
South African restorers often find that original safety devices were crude or missing. I have seen units where the only protection was a manual valve! A 2022 survey of vintage units showed most lacked any flame supervision. Adding these controls makes a gas fridge old safer than many modern camper fridges. Your vintage cabinet keeps its character, and you keep peace of mind.
Improving Door Seals and Insulation Without Ruining the Look
There is a particular sadness in a vintage refrigerator with a perfect porcelain shell and a door that hangs askew, whispering cold air into the kitchen. The seal is the first line of defense. The original rubber gaskets, often hardened to a brittle, black plastic, have lost their magnetic grip. Replacing them with modern, magnetic equivalents is a simple act of preservation. The profiles differ, but the fixing method is usually a series of screws or a retaining strip. A properly aligned door frame is non-negotiable. You can test it with a piece of paper; if it slides out easily, the latch needs adjustment or the hinges need shimming.
The true energy loss, however, is hidden within those beautifully insulated walls. The old fiberglass batting, if it has not turned to dust, has settled and compacted. The thermal performance degrades with every decade. Injecting modern polyurethane foam is the robust solution for a gas fridge old cabinet, but it presents a problem. The structural integrity of vintage panels can be compromised by expanding foam. A safer approach is to remove the inspection plate on the back and carefully pack high-density polystyrene sheets into the void. This is delicate work. Each layer must be cut precisely to fit. The result, however, is a dramatic improvement in efficiency. The burner runs less frequently, the interior stays colder, and the ammonia cycle operates within its optimal parameters.
Consider the following materials for this retrofitting task:
- Closed-cell polyurethane foam sheets, which offer the highest R-value per inch without excessive expansion pressure.
- Reflective foil barriers placed directly behind the evaporator to radiate heat back into the cabinet.
- Flexible butyl rubber tape for sealing any internal wiring or piping penetrations, preventing air infiltration.
The charm of the original exterior remains untouched. The restoration is an internal affair, a quiet upgrade to the working heart of the appliance. The gasket is the most visible change. Aligning the new seal is a process of patient adjustment, checking the clearance at every corner. With the door closed, there should be a consistent, even pressure all the way around. The insulation work is messier. Wearing gloves and a dust mask is essential. But the effort yields a machine that respects your propane supply and your patience. The silence of a well-sealed cabinet is its own reward, a testament to the ingenuity of solving an old problem with new materials. Your gas fridge old becomes a reliable fixture, not a source of anxiety.




0 Comments